
…yes thank you Steve I worked that out for myself!
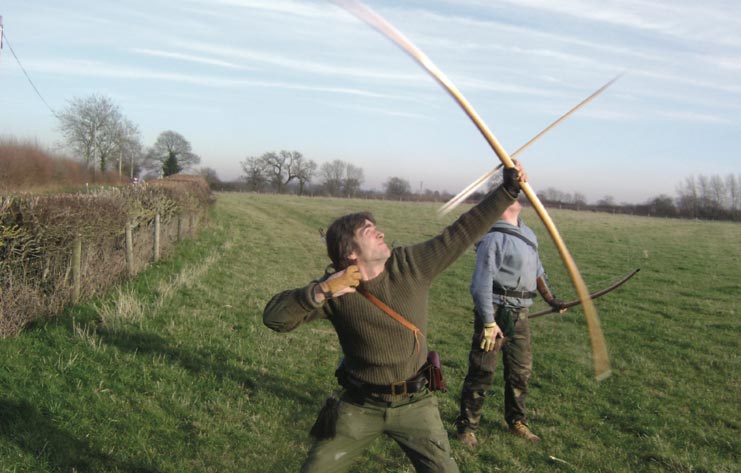
Trying to draw a 100lb draw weight bow when you are a fifty two year old knackered teacher is going to hurt, but not as much as I thought it would. Even if I couldn’t yet get the full power from the bow, and I will, the bow I made still shot the ash shafts which I made, with the string that I made, some 175 yards and with extraordinary ease. abcd
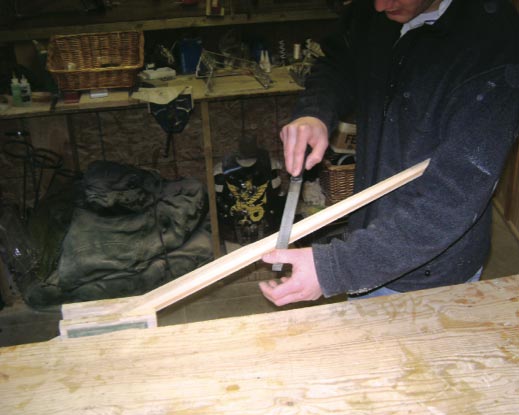
Nathan working on turning the stave into a bow. A minor error at this stage could reduce the performance of the bow or even marr it completely.
There is no need to make your own bow, as Steve said when we had finished making mine “Looks just as good as a bought one”, (his shop I hope). There are excellent bowyers who can make bows for you but making your own will give an insight into the craft that nothing else can. Steve Stratton of DIY Archery has been running warbow making courses about twice a month for the past eight months, with two or three would be bowyers at a time; he will take you through the whole business of making a bow from the stave to the shooting field in one weekend. Steve has had a busy background in archery, especially flight shooting over almost six years but has only recently taken up a career in archery as bowyer, fletcher and stringmaker. A steward of the ancient and prestigious Finsbury Archers and an enthusiastic organiser and participant of warbow and field shoots, his commitment to the sport and the art of archery is unquestionable. Not a big man physically, he has immense energy and took to the challenge of warbow shooting and making with all the enthusiasm of someone who had escaped the dreary world of computers. Over the past five years there has grown considerable interest and practical experience in the making and shooting of warbows. Robert Hardy’s most recent magnum opus was entitled just that. How does a warbow differ from an ‘ordinary bow’ and why should one want to make and shoot one?
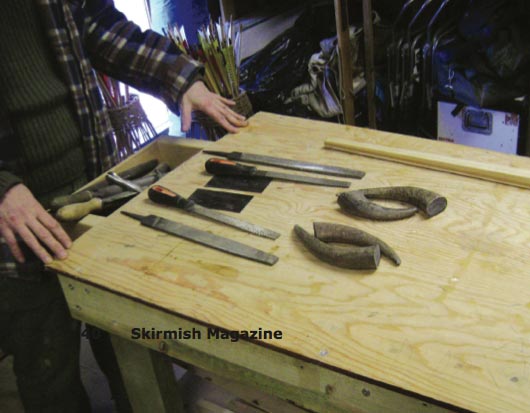
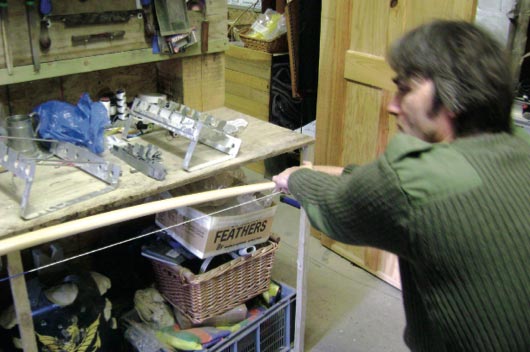
Tools. Simplicity itself but occasionally power tools could take the labour but not the skill out of a job.
The discovery of the Mary Rose and her stock of archery equipment was a revelation for archaeologists, historians and archers. The bows and shafts were of the highest quality and the culmination of centuries of skill and commitment to military archery. They demonstrated that the bows had a draw weight of between 120 to 160 pounds with some well over that. Steve set himself the task of making such bows and the shafts that go with them. Those modern archers often involved in re-enactment, who seek a challenge, have found it in his warbows. He uses a range of woods for his bows, some laminates and some self- wood bows. For the course he provides a traditional mix of lemonwood for the belly, hickory for the back and a hardwood core of opepe. This provides the elasticity and resistance to compression needed to produce the natural spring that is a bow, whilst the hardwood core provides a backbone. The upper limb is to be made slightly more flexible than the shorter lower limb to ensure a balanced loose.
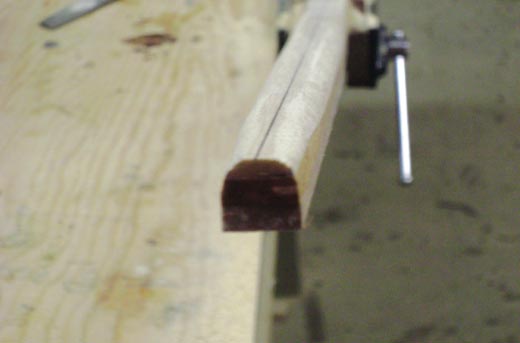
The D shape is coming on nicely, pencil marks help guide the tools but touch is even more important than sight when getting the profile of the bow right.
He also uses native yew, some of exceptional quality and most interesting of all Italian yew. This is extremely rare and is the closest wood that we have to the original yew bows whose staves were imported from this area of Europe. Grown at 3,000 metres and more, the wood is very close grained with a minimum of 60 and sometimes with 100 growth rings per inch. This compares with 20-30 rings per inch for English Yew and 30-50 for Oregon yew from the United States. The trees from which his staves are drawn are up to some five hundred years old.
Nathan and Steve tillering Nathan’s bow. Steve generously allowed us to do the donkey work at this stage, we were now teaching the wood to bend.
Only a few staves are allowed to be exported by Steve, as these trees are protected in Italy. Even so Steve now has access to a supply of wood that is as close to the medieval original as possible. The bows that are made demonstrate the characteristics one would expect and hope for, light weight, tremendous cast and great reliability, able to shoot thousands of arrows, not as some thought a sheaf before breaking. Steve together with such master archers as Mark Stretton have committed themselves to the making and testing of archery equipment as close to the medieval and Tudor originals as possible. Testing, if necessary to destruction is the only way to discover the limits of the fabled equipment of the English archer. Steve has set aside some of his best Italian yew to make a replica of the bow found in the possession of Ötzi the ‘iceman’ whose mummified bronze age remains of some 5,300 years ago were found on the Austro-Italian border in 1991. Hopefully we will be receiving an article from Steve on this fascinating project.
Steve’s bows are big, but not monstrous. The staves we worked with were excellent, with full-length fibres and without blemish; he believes that performance should not be achieved by overstressing the materials. It is not long since it was difficult to get a bowyer to make a bow with a draw weight more than seventy or eighty because of the perceived difficulties.
Brute force but not ignorance. A stiff limb needs to be encouraged to move, more physiotherapy for wood than anything more brutal.
The first task took some four hours and involved the shaping of the stave to give it the characteristic D shaped profile. Using only a rasp it required great patience if the bow was to maintain its profile and performance. As all woodworkers know it is easy to remove wood and impossible to replace it, especially at this stage. Too much wood removed would reduce the draw weight of the bow and even endanger its integrity. The work is done solely by hand and eye, by closing your eyes it is possible to get an even better sense of the profile of the bow as minute and imperceptible variations become obvious to your fingers. The process is very tactile and requires great concentration. The bow is designed to be drawn full compass that is when full drawn it will form a semi-circle. Modern bows have a stiffened handle with only the upper and lower limbs moving. In a traditional design such as this the whole bow moves in the hand, making for a better cast but a more difficult bow to manage.
Steve uses a cabinet scraper to remove paper thin layers of wood to bring the limb round just as he wants it.
After roughing out the shape and receiving his approval it was a matter then of sanding the bow and cutting the nocks for tillering. Tillering is where Steve’s skill and experience is most apparent. The handle of the bow is set 1” above the centre point and 3” below, as the heel of the hand is where the bow is held. Steve takes you through the process explaining each stage, identifying and resolving the problems as and when they arise. The wood needs to be ‘taught to bend’ as he says. Fibres need to become used to the business of stretching and compressing without being torn apart suddenly. It is a slow process as the bow is taken through its early paces. The handle area staying horizontal as the bow is pulled down on the tiller is what you are initially looking for while keeping a close eye on whether the limbs are bending evenly and not as I thought, the limbs and the ends of the bow. He is looking for stability and a slightly stiffer lower limb, this due to the bottom limb being 2” shorter. You do not want too much movement at the tips at this stage, the bow will come full compass and the tips will move at full draw. If the limbs are whip ended at this early stage the bow could take on a set and the bow will lose performance and could break later. I was working alongside Nathan, half my age with twice the facility with woodworking tools and his bow required very little work to bring it into tiller.
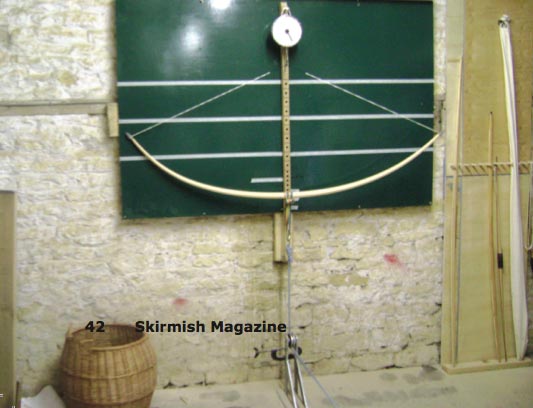
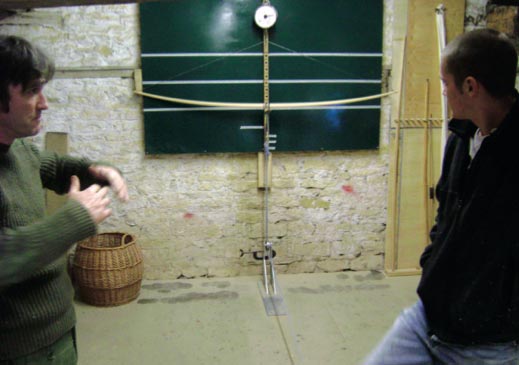
Tillering my bow, the scales go up to two hundred pounds and many of Steve’s bow as far in excess of the meagre 100lbs. I asked for.
The work needed on my bow was considerable but subtle. My excuse for there being any need for further work to be done on the bow or the reasons given to me, were that the density and elasticity of wood are not constants and that as a natural material it is inconsistent, that is why working with wood is both frustrating and a pleasure, it is not MDF. Steve and I studied the bow as it was partly drawn and discussed the shape of the limbs and where it was best to remove some wood, keeping in mind that any adjustment would both reduce the draw weight and have implications for the behaviour of the other limb. This is why this course is invaluable. Steve was able to take me through what needed to be done first by stretching the fibres in the timber by hand, an energetic but careful business and then performing the small but critically important removal of wood from the lower limb using a cabinet scraper. He removed perhaps half a millimetre from the surface, tillered the bow again and further minor adjustments resulted in a bow that satisfied Steve and amazed me.
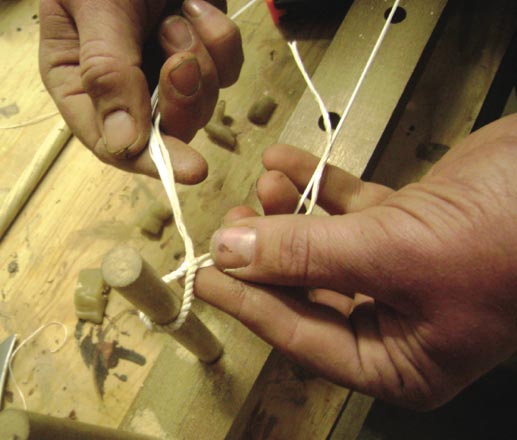
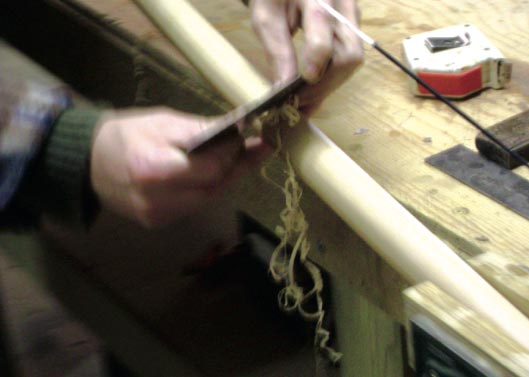
Richard’s fingers deftly creating a bowstring. Doing is the best way of learning.
Sanding the bow to clean up the limbs and marking the arrow pass left me after the first day with what was undoubtedly the beginning of a bow. After six hours labour we turned to string making. Richard Tonge has been working with Steve on a regular but part time basis for only five months. He started shooting only five months ago and working with Steve he naturally took up shooting a warbow. He is massively strong, shooting 120lb bows with ease but has deft fingers and a craftsman’s eye. I watched him prepare a hardwood bowstave and what took me four hours took him half an hour! He took us with patience and skill through string making. I have read about this and watched it but never began to understand it. After five minutes instruction and with his oversight I completed my first string in only ten minutes. I will now save a load of money by making them myself from now on. The day’s work finished with fitting the horn, which on the next day we would shape into nocks. At the end of the day we finished with an indoor archery round which Steve won, although he was given a run for his money.
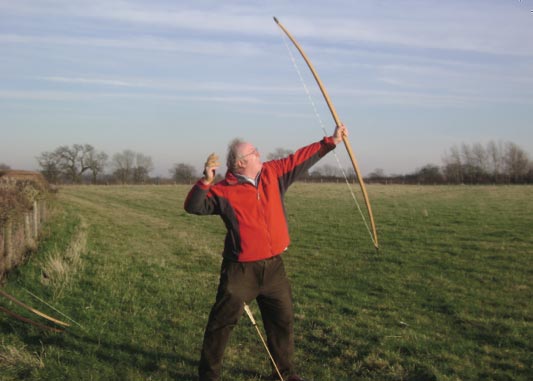
Jonathan with a bow, pleased as punch with himself.
The next day started with shaping the nocks, first roughly with the sander and then finely and slowly with sandpaper and elbow grease. I hate horn, it smells revolting when machined, however the process of finishing it off was a great pleasure, ensuring a perfect fit between the horn and the wood and that the string would lie comfortably with no danger of breaking. We were using fastflite string rather than Dacron as it makes a very thin string that does not stretch after fitting. Tillered once more, this time to thirty inches, and yes at this stage it could still break easily, it reached 95 lbs. At thirty two inches it would reach the magical ton. Nathan’s bow was a comfortable 85lbs at 30” and would make the 90lb he had requested. they were both treated with sealant and so off to the pub. How would they shoot? Steve and Richard took us to a nearby farm where they have access to a field some 280 yards in length. The key to shooting these big bows is to draw them higher on the face than most traditionally taught archery and then rotate the shoulder back and down bringing the arrow to or behind the ear. This is difficult to do especially if the bow weight you are drawing is as much as a large primary school child! At half draw the arrows reached well over a hundred and to my face well over a hundred and fifty. Shooting at a mark set a hundred and seventy five yards away was easy, although Nathan’s and my arrows were landing nearly vertical Richard’s and Steve’s were still pretty flat. It was lovely! Unlimited space to shoot, brilliant weather, good arrows, excellent company, a wonderful could, but not a bow within the meaning of the act. I certainly gained an insight into the craft and an even greater respect for the bowyers’ skills. I could certainly, with further help and advice go on to make more bows and then perhaps one-day make a really good bow of my own. As it is I left Dorn Hill Farm with what is an excellent bow, for which I did some 80- 90% of the work, which in itself was well worth the course fee of £200. I also left with new skills, new enthusiasm and new friends. I love my bow and only hope that I can do it justice on the archery field if not the battlefield.
Article and images by Jonathan Davies : Issue 59
DIY Archery www.diyarchery.co.uk


Leave A Comment